Do you wanna add HTTP security headers in WordPress?
HTTP security headers let you add an extra layer of security to your WordPress site. These headers can help block common masquerading attacks from decelerating your site performance.
In this beginner’s guide, we will explain what are HTTP security headers and will show you ways to easily add HTTP security headers in WordPress.
Table of Contents
What are HTTP Security Headers?
HTTP security headers are the security measure that lets your site’s server avoid a few common security threats prior it affects your site.
Principally, while a visitor visits your site, your web server sends an HTTP header response back to their web server. This response describes the browsers about the error codes, cache control, and other statuses.
The normal header response issues a status called HTTP 200. Following which your site loads in the user’s browser. But, if your site has complexities then your web server may send a distinct HTTP header.
For instance, it may send a 500 internal server error, or a not found 404 error code.
HTTP security headers are a subset of these headers and are utilized to restrict websites from common threats such as clickjacking, cross-site scripting, brute force attacks, and more.
Let’s have a look at what HTTP security headers seem to be and what they do to secure your site.
HTTP Strict Transport Security (HSTS)
HTTP Strict Transport Security (HSTS) header states web browsers that your site utilizes HTTPs and should not be loaded utilizing a protocol such as HTTP.
If you have migrated your WordPress site from HTTP to HTTPs, the security header lets you prevent browsers from loading your site on HTTP.
X-XSS Protection
X-XSS Protection header lets you block cross-site scripting from loading on your WordPress site.
X-Frame-Options
X-Frame-Options security header avoids cross-domain iframes or click-jacking.
X-Content-Type-Options
X-Content-Type-Options blocks content mime-type sniffing.
With that being said, let’s have a look at how to easily add HTTP security headers in WordPress.
Adding HTTP Security Headers in WordPress
HTTP Security headers work at maximum efficiency while they are set at the webserver level. This enables them to be triggered early on during a typical HTTP request and offers maximum benefit.
And, if you are utilizing a DNS-level web application firewall such as Sucuri or Cloudflare. We will be showing you each of the methods, and you can choose one that works fine for you.
Adding HTTP Security Headers in WordPress using Sucuri
Sucuri is one of the best WordPress security plugins that’s available on the market. This plugin is well-known for the website firewall service. But, you can even set HTTP security header without needing to write any code.
The first and foremost step you need to do is sign up for a Sucuri account. The plugin has premium plans that provide you features like server-level website firewall, security plugin, CDN, and malware removal guarantee.
While the sign-up, you will need to answer some simple questions, and Sucuri documentation will help you set up the website application firewall on your site.
Once you are done with the sign-up process, you will have to install and enable the free Sucuri plugin. For additional information, see our step-by-step guide on how to install a WordPress plugin.
Once the plugin has been activated, navigate to Sucuri Security » Firewall (WAF) page and enter your Firewall API key. You can look for this information under your account on the Sucuri website.
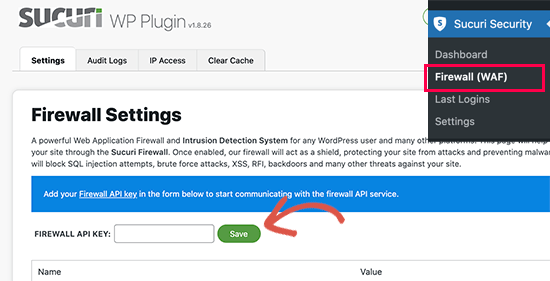
Then, click the save button so that your API Key will be stored.
Next, head on to your Sucuri account dashboard. There, you need to click on the Settings menu placed at the top right and then switch to the Security tab.
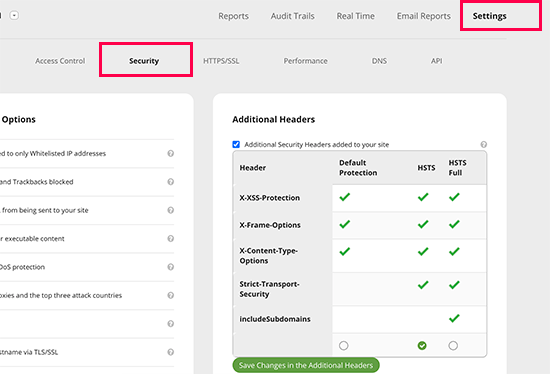
Once you are in the Security tab, you can opt from three sets of rules. The default protection, HSTS, and HSTS Full. You will observe which HTTP security headers will be applied for each set of rules.
Last but not least click the ‘Save Changes in The Additional Headers’ button to apply your changes.
That’s it, Sucuri will now add your chosen HTTP security headers in WordPress. As it is a DNS level WAF, your site traffic is safeguarded against hackers even before they reach your site.
Adding HTTP Security Headers in WordPress using Cloudflare
Cloudflare provides a basic free site firewall and CDN service. With their free plans, you don’t get advanced security features. So, to avail themselves, you need to upgrade to their Pro plan which is more costly.
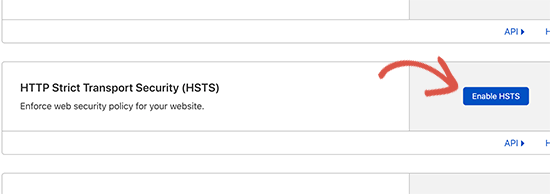
On activating Cloudflare on your site, head on to the SSL/TLS page under your Cloudflare account dashboard and then switch to the Edge Certificates tab.
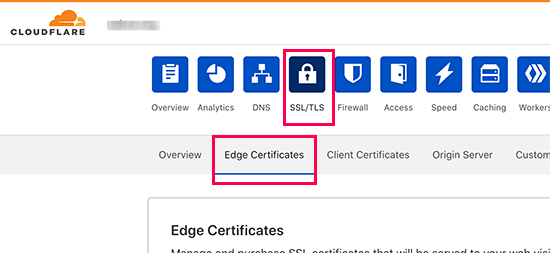
Next, scroll down to the HTTP Strict Transport Security (HSTS) section and then click the ‘Enable HSTS’ button.
By doing so, it will bring up a popup with instructions stating that you need to enable HTTPS on your WordPress blog before using this feature. To continue with the process, you have to click on the next button where you will observe the options to add HTTP security headers.
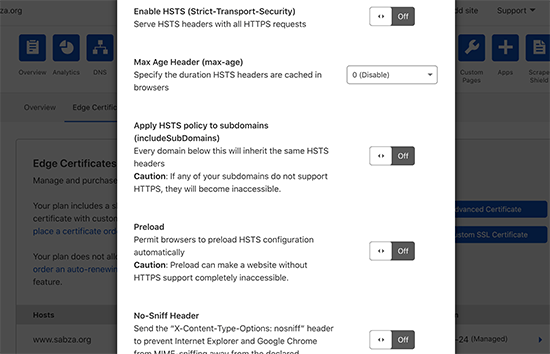
Next, you need to enable HSTS, no-sniff header, apply HSTS to subdomains (if they are utilizing HTTPS), and preload HSTS.
This method offers standard protection with the help of HTTP security headers. But, one drawback is that it doesn’t allow you to add X-Frame-Options and Cloudflare does not have a user interface to do that.
With Cloudflare’s Workers feature, you can create a script. However, creating an HTTPS security header script isn’t beginner-friendly and can cause unforeseen issues.
Adding HTTP Security Headers in WordPress using .htaccess
This method enables users to set the HTTP security headers in WordPress at the server level.
It needs you to edit the .htaccess file on your site. The .htaccess file is a server configuration file used by the Apache webserver software.
You have to just connect your site with the help of an FTP client, or with a file manager app in your web hosting control panel. In the root directory of your site, you just have to locate the .htaccess file and edit that file.
By default, your file will be opened in a plain text editor. Go to the bottom of the file, you can add the code to add HTTPS security headers to your WordPress site.
You can utilize an FTP client to connect your site or the file manager app within your hosting control panel.
In the root directory of your site, you have to search for the .htaccess file and edit that file.
You can use the sample code as an initial point, it sets the most widely utilized HTTPs security headers with optimal settings.
<ifModule mod_headers.c>
Header set Strict-Transport-Security "max-age=31536000" env=HTTPS
Header set X-XSS-Protection "1; mode=block"
Header set X-Content-Type-Options nosniff
Header set X-Frame-Options DENY
Header set Referrer-Policy: no-referrer-when-downgrade
</ifModule>
After doing all the changes, don’t forget to save your changes and check your site to ensure that everything works as anticipated.
Most web hosts trigger 500 Internal Server Error because of incorrect headers or conflicts in the .htaccess file.
How to Check HTTP Security Headers for a Website
Now, you have added HTTP Security headers to your site. You can test your configurations using the free security headers tool. Just enter your website URL and click on the Scan button.
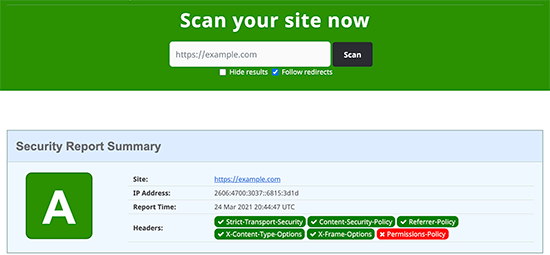
Once you press the scan button, it will check HTTP security headers for your site and offer you a report.
The tool will show you which HTTP security headers are sent by your site and which security headers aren’t included.
That’s all from us we hope this blog post helped you learn how to add HTTP security headers in WordPress.
Additionally, you may also want to see our guide on “What are WordPress Security Keys?” and “Best WordPress Backup Plugins Compared (2020)“.